Original Link: https://www.anandtech.com/show/464
A-Top AT900 Mid Tower ATX
by Mike Andrawes on January 30, 2000 11:39 PM EST- Posted in
- Cases/Cooling/PSUs
|
Quick Look |
||
|
A-Top
AT900 |
The Good | |
|
+ Thumb screw side panel access |
||
| The Bad | ||
|
-
Poor construction quality |
||
A little while back, AnandTech took a look at the Atop Translucent X2, the first translucent case to make its way into our labs. Unfortunately, we found that case a poor choice for anyone interested in anything beyond the looks of their case.
But Atop has been in the business for quite a while, with OEM wins such as DTK. That doesn't just happen as a result of pure luck, so they must be doing something right.
Today we take a look at the second Atop case to run through our gauntlet of tests. That case is the AT900, which is a far more traditional model than the Translucent X2.
|
Specifications |
|
| Form Factor | ATX Mid Tower |
| Drive Bays |
4 external 5.25" |
| Cooling |
Power supply exhaust
fan |
| Other Features | Thumb
screw side panel access Slide out motherboard tray |
| Dimensions (HWD) |
21" x 7.5" x 17" |
| Power Supply | Tough
Power ATP250-ATX 250W |

Design
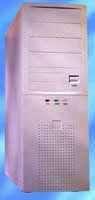
The Atop AT900 looks like almost any other mid tower ATX case. At 21" tall, it is bigger than most cases classified as "mid towers," but it's definitely not a full tower. The front bezel is cleanly laid out, with the power button to the right of the 3.5" bays. The reset button, HD activity LED, and the power LED are located just below those same drive bays. Both buttons are large and easy to press.
The bottom of the bezel features a number of holes that act as an air vent. Our evaluation sample featured an exhaust fan mounted in the side panel, with a metal fan guard to prevent any lost fingers. Although it is typically not available directly from Atop with this fan, it's simple enough to cut your own hole and mount a fan in that position.
Two thumb screws secure the left side panel, which is all that you'll need to remove for full access to the AT900. Two standard screws are used to attach the right panel, which fortunately does not need to be removed under most circumstances. The front bezel can be removed simply by tugging on it. The top panel is not removable.


Expansion
The additional size of the AT900 is put towards additional expansion space. That means 8 drive bays stacked right on top of each other. Of those 8, 4 are 5.25" external bays, 2 internal 3.5" bays, and 2 external 3.5" bays. The 4 external 5.25" bays puts the AT900 slightly ahead of most other mid towers.

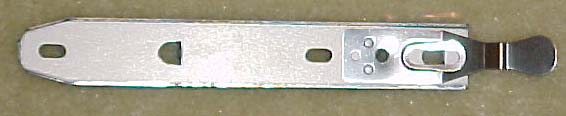
A unique screwless drive rail system is used to install all drives in the AT900. Small tabs on the rails are inserted into the screw holes on each drive. Then simply slide the assembly into the case from the front until the rails click into place, indicating that they are secure. There's nothing to actually secure the rails to a drive beyond the pressure given from the case frame itself. Even hard drives are mounted in the same manner, except they slide into the bay from the inside of the case. Rails are used on both sides of 5.25" devices, while one side of 3.5" devices are secured to the frame by screws rather than rails.


The metal inside the case all has a "chrome" finish that makes everything very shiny. Most edges are rounded off, but there are a few sharp ones, so be careful. The sheet metal is fairly thin and can easily be bent.
Motherboard Installation
Motherboard installation is also quite easy thanks to the slide out motherboard tray. A single tab holds the motherboard tray in place - simply lift that tab and pull back to remove the tray completely. Once removed, standoffs screw into the tray, and the motherboard is then attached to those standoffs with standard case screws. The nice thing about A-Top's motherboard tray is that it can be removed with all expansion cards still installed.


Our test bed ABIT BX6 Revision 2.0 fit without any issues and just about any single processor board should fit fine. Most smaller dual processor boards should fit fine as well, but it will be a tight squeeze. The layout of the case gives plenty of room to access all components of the motherboard, even without removing the entire motherboard tray.
Power Supply & Cooling
A Tough Power ATP250-ATX power supply puts out 250W as the primary PSU option from Atop Although it's not on AMD's Athlon Approved Power Supply List, we found that it was still a generally acceptable solution. It would easily power Test System #1 used in our AMD Athlon Buyer's Guide - Part 4: Power Supplies article, but did not fare so well with Test System #2. If your system is that powerful, consider a power supply upgrade.
An 80 mm fan exhausts air out the back of the PSU in accordance with ATX 2.01 specifications. They were wise enough to include a physical power switch on the back of the power supply that, although its not mandatory, can come in quite handy at times.


An additional 80 mm intake fan is available, but not included, in the bottom front of the case. Above the ATX I/O shield, a 40 mm exhaust fan can also be mounted to help keep the CPU just a bit cooler. Our evaluation sample featured an 80 mm exhaust fan mounted in the side panel, with a metal fan guard to prevent any lost fingers. Although it is typically not available directly from Atop with this fan, it's simple enough to cut your own hole and mount a fan in that position.
With all those fans in place, the AT900 produced quite a bit of noise at over 61dB. Further, a number of rattles were observed in our sample at points where the metal did not fit tightly together, such as the loose fitting rail system.
The Test
For full details on how we tested, please read AnandTech's case testing methodology.
The AT900 evaluation sample AnandTech received from Atop was equipped with two optional fans - the 80 mm intake fan at the bottom front of the case, and a second 80 mm exhaust fan mounted in the side panel. That 80 mm side panel mounted fan is not normally an option, but we were unfortunately not informed of this until after testing was completed.
The AT900 also did a surprisingly good job of keeping our test bed system nice and cool. The additional exhaust fan mounted in the side panel certainly helped quite a bit, but remember that it is not normally included. Maximum HD and case temperatures were even cooler than many larger cases, such as the Supermicro SC750-A and the Enlight EN-8950.
Once again, CPU temperature has generally shown to be most dependent on having a high quality heatsink and fan in AnandTech's testing.
Conclusion
|
Quick Look |
||
|
Atop
AT900 |
The Good | |
|
+ Thumb screw side panel access |
||
| The Bad | ||
|
-
Poor construction quality |
||
Overall, the Atop AT900 is a decent case that's fairly easy to use and cool quite well. That cooling, was of course with a case modified especially for AnandTech, but that does no good for all of you out there looking to buy this case. Further, construction quality isn't quite there and there is really little to distinguish the AT900 from the rest of the pack.
As such, if you can get a good deal on the AT900 or it is the only locally available option, don't hesitate to go for it. Just understand that there are better overall solutions out there.


